Tag Cloud
Currently Reading

Latest Book Reviews
- Rancher Deep Dive Posted on March 31, 2023
- Leveraging Kustomize for Kubernetes Manifests Posted on March 24, 2023
- Automating Workflows with GitHub Actions Posted on October 13, 2022
- Deep-Dive Terraform on Azure Posted on August 30, 2022
- Effective DevOps Posted on January 5, 2022 All Book Reviews
Latest Posts
- Configure BIND to support DDNS updates Posted on March 28, 2021
- 389 Directory Server GUI with Cockpit Posted on March 28, 2021
- Exclude comments and empty lines from file Posted on May 24, 2020
- Running Ubuntu Server on an Intel NUC 10th i7 Posted on March 2, 2020
- Send Email from a Shell Script Using Gmail’s SMTP Posted on June 10, 2019
March 28, 2021
Configure BIND to support DDNS updates
by Alpha01
I use BIND on my home network for both authoritative and forwarding name resolution. In it I have a few private DNS zones I use for testing and for my homelab setup. The main primary dns zone I use for my homelab is rubyninja.org. Previously when I wanted to make DNS changes, I just ssh into my master nameserver, I update the zone file, and reload. While this worked great for me these last 10+ years that I’ve running BIND. It obviously doesn’t follow good DevOps practices.
If you’re in a normal BIND environment where you already using rndc, to administer your server, then you’re almost quite there.
BIND Configuration
1). Secret Key Transaction Authentication (TSIG) key. (Where ddnskey. is the name of the key) Approach A: Using dnssec-keygen
mkdir ddns
dnssec-keygen -a hmac-md5 -b 512 -n HOST -r /dev/urandom ddnskey.
The above command will create two Kddnskey files. One ending *.private while the other *.key.
Approach A: Using tsig-keygen
tsig-keygen -a hmac-md5 ddnskey.
Either approach is fine, for this example I opted to use dnssec-keygen since I’ll be using the created key file to test a dynamic dns update.
2). Update named.conf file. Include the newly created key configuration:
key "ddnskey." {
        algorithm      "hmac-md5";
        secret          "PRIVATEKEYHERE==";
};
Now, it’s just a matter of setting the allow-update configuration to allow updates using our newly created key.
zone "rubyninja.org." IN {
        type master;
        file "etc/zones/db.rubyninja.org";
        allow-transfer { trusted-servers; };
        allow-query { any; };
        allow-update { key rndckey; };
};

zone "k8s.rubyninja.org." IN {
        type master;
        file "etc/zones/db.k8s.rubyninja.org";
        allow-transfer { trusted-servers; };
        allow-query { any; };
        allow-update { key "ddnskey."; };
};
It is worth indicating that BIND also includes the update-policy option for more finer-grained options for the type of updates that we want to allow.
3). Testing using the tool dnsupdate (part of bind-utils) we can easily test doing an update to verify the setup works as expected.
$  nsupdate -d -k Kddnskey.+157+06602.key
Creating key...
> server ns1.rubyninja.org
> zone k8s.rubyninja.org.
> update add tonytest.k8s.rubyninja.org. 3600 A 192.168.1.25
> send
Resources
- https://docs.netgate.com/pfsense/en/latest/recipes/bind-rfc2136.html
- https://www.thegeekdiary.com/how-to-use-rndc-command-command-line-administration-tool-for-named/
bind March 28, 2021
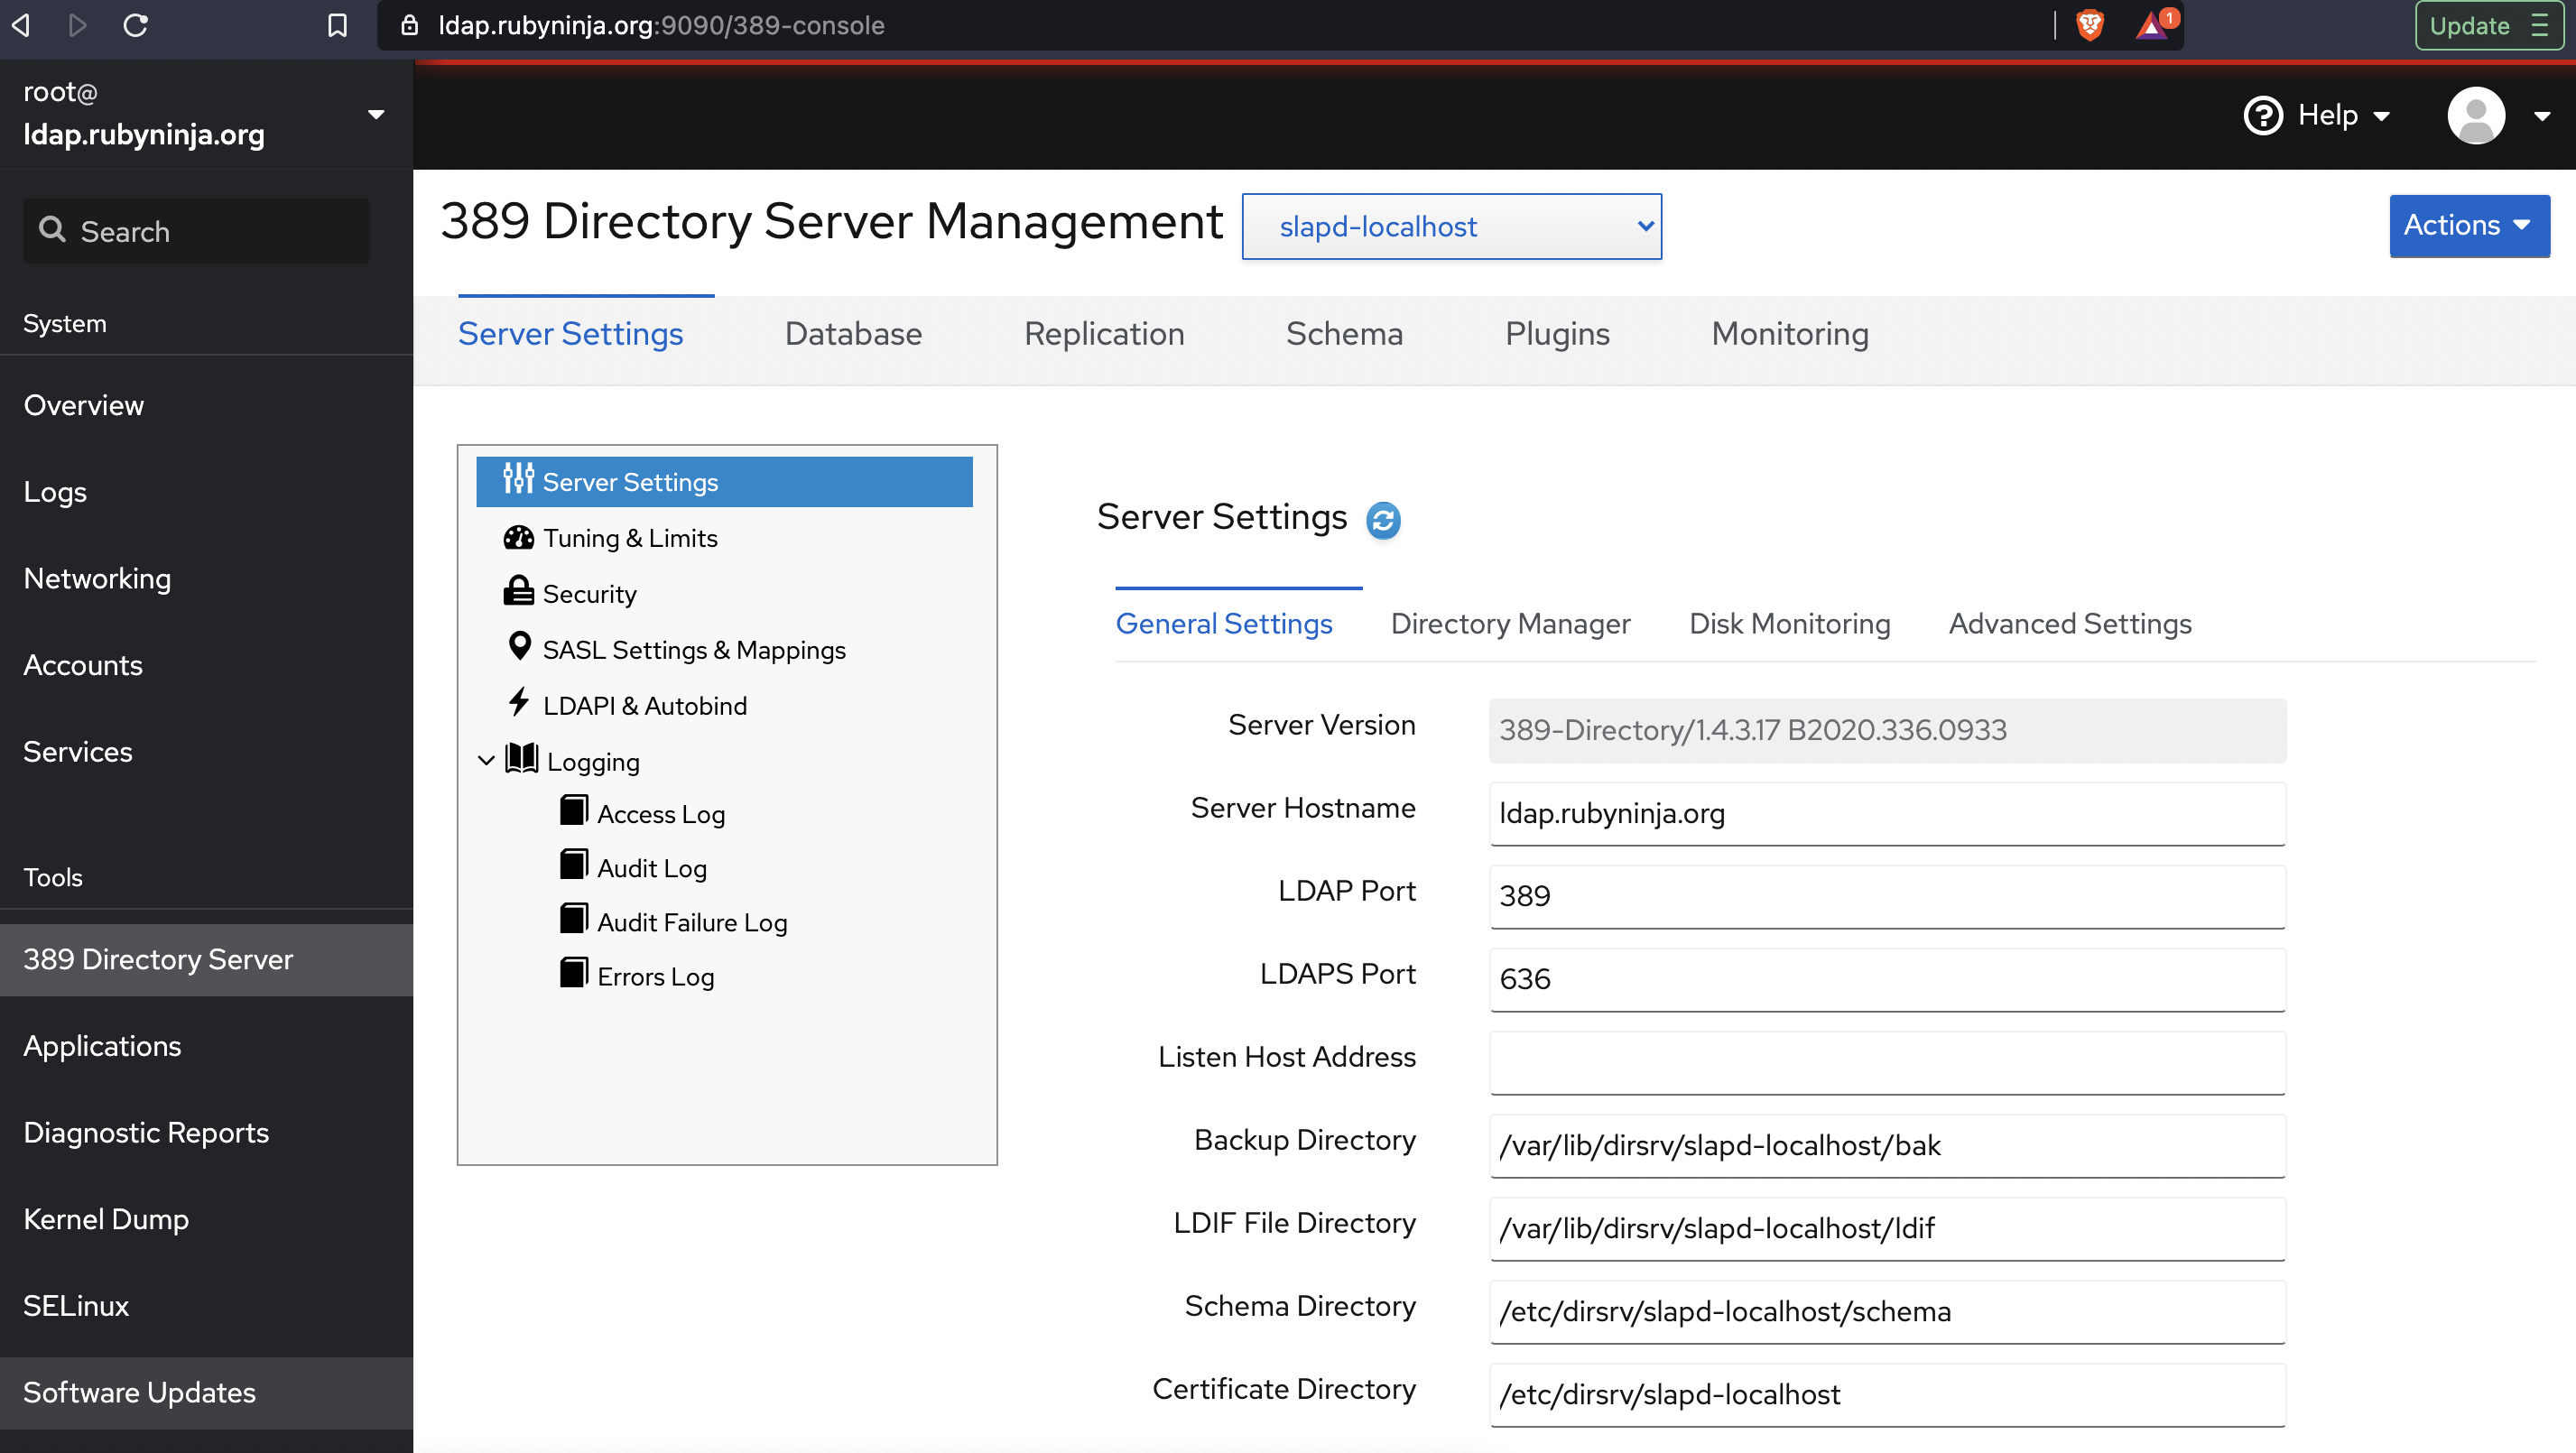
389 Directory Server GUI with Cockpit
by Alpha01
So I have a 389 Directory Server up and running. The next step to ease administration was to find a GUI. My first logical approach was to use Apache Studio, however I’m trying to the keep number of non ARM applications on my shiny Apple M1 MacBook Pro to an absolute minimum, so I opted to not install Apache Studio. At least not yet. Luckily, I learned that RedHat has a Webmin equivalent called Cockpit that comes with built-in support for 389 Directory Server Management.
The Cockpit application was already installed on my base RHEL 8 system, I simply just copied over my fullchain Let’s Encrypt SSL certificate to /etc/cockpit/ws-certs.d/ssl.cert and restart the service.
systemctl restart cockpit
Then it was just a matter of updating firewalld
firewall-cmd --add-port=9090/tcp
firewall-cmd --permanent --add-port=9090/tcp
firewall-cmd --reload
The Cockpit application runs by default on port :9090
389-directoryserver rhel cockpit May 24, 2020
Exclude comments and empty lines from file
by Alpha01
Every so often theirs the need to view a configuration (usually a large one), and you want an easy way to exclude all comments and empty lines:
egrep -v '^(#|$)' your-config-file.cfg
bash March 2, 2020
Running Ubuntu Server on an Intel NUC 10th i7
by Alpha01
Late last year, I purchased a secondary Intel NUC 8th i3 for my homelab. My main goal was to use this secondary NUC primarily to learn Mesos and Kubernetes more in depth. Little that I knew that the dual core i3 on the NUC was not truly powerful enough to run a simple ten node DC/OS cluster, let alone another Kubernetes cluster on the same machine. So I decided to wait until the new i7 10th generation Intel NUCs were released, so I can upgrade.
The upgrade itself was not as easy as I first imagine. Both the RAM and hard drive were swapped from the old 8th gen NUC to the new 10th gen NUC. Ubuntu started up successfully, and all the memory was properly recognized on the new machine, however networking was not working. My first thought was that since now Linux was running on a new hardware, I needed to remove the old NIC’s udev configuration. I soon realized that apparently in the post systemd world, we no longer need to do this. After a quick Google search, I found a Reddit post that outline my exact problem. https://www.reddit.com/r/intelnuc/comments/eox6k1/caution_new_frost_canyon_nucs_have_an_integrated/
I was shocked to learn that the new 10th gen NUC’s network card is so new that it doesn’t even have its driver on the latest Ubuntu Server LTS! Luckily compiling and loading the newer e1000e driver was a really easy task. The only caveat was that I had to go into the UEFI Bios and disable secure boot and allow 3rd party modules, otherwise the new kernel module would fail to load.
After a few hours of usage, performance is completely night a day. The new 10th gen i7 hex core processor completely blows 8th gen i3 dual core, out of the water.
Tags: [ubuntu June 10, 2019
Send Email from a Shell Script Using Gmail’s SMTP
by Alpha01
In my previous post, I enabled my local mail server to relay all outgoing mail to Google’s SMTP servers. However if you want to completely bypass using any sort of MTA, then you will only need to configure your Mail User Agent client to use Gmail STMP settings directly.
In Linux, I’ve always used the mailx utility to send out email messages from the command line or from a shell script. By default, mailx uses the local mail server to send out messages, but configuring it to use a custom SMTP server is extremely easy.
Inside a shell script configuration would look like this:
to="[email protected]"
from="[email protected]"
email_config="
-S smtp-use-starttls \
-S ssl-verify=ignore \
-S smtp-auth=login \
-S smtp=smtp://smtp.gmail.com:587 \
-S from=$from \
-S [email protected] \
-S smtp-auth-password=ULTRASECUREPASSWORDHERE \
-S ssl-verify=ignore \
-S nss-config-dir=/etc/pki/nssdb \
$to"

echo "Test email from mailx" | mail -s "TEST" $email_config
To have the mail settings configured to be used by mailx from the command line simply set your settings in ~/.mail.rc
set smtp-use-starttls
set ssl-verify=ignore
set smtp=smtp://smtp.gmail.com:587
set smtp-auth=login
set smtp-auth-user=[email protected]
set smtp-auth-password=ULTRASECUREPASSWORDHERE
set from="[email protected]"
set nss-config-dir=/etc/pki/nssdb
Resources
Tags: [google smtp