Tag Cloud
Currently Reading
 Study Guide")
Latest Book Reviews
- Certified Kubernetes Application Developer (CKAD) Study Guide, 2nd Edition Posted on January 11, 2025
- Rancher Deep Dive Posted on March 31, 2023
- Leveraging Kustomize for Kubernetes Manifests Posted on March 24, 2023
- Automating Workflows with GitHub Actions Posted on October 13, 2022
- Deep-Dive Terraform on Azure Posted on August 30, 2022 All Book Reviews
Latest Posts
- Running my own Git server: GitList Posted on July 13, 2015
- Git Ansible Playbooks Posted on July 7, 2015
- Server Move and Upgrades! Posted on June 22, 2015
- Networking Quirk in CentOS 7 - Virtual IP not being assigned Posted on June 14, 2015
- Automated SSL certificate expiration check Posted on June 4, 2015
July 13, 2015
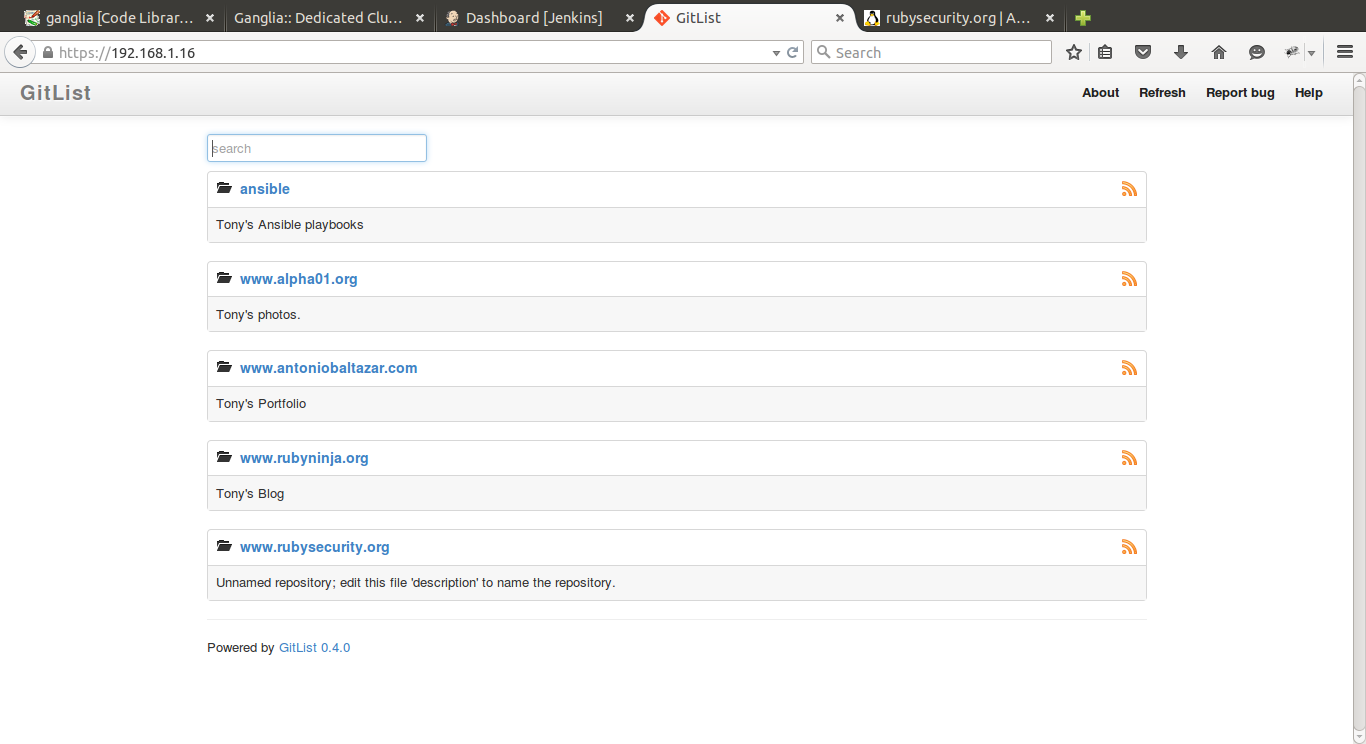
Running my own Git server: GitList
by Alpha01
For the longest time I’ve been wanting to streamline updates to my sites, ie. implement good software deployment technique and procedures. To be specific, start using Git for source code management, and Jenkins to deploy. No, I’m not drinking the whole Agile Kool-Aid. After all we’re in 2015, and people who still continue to use FTP/SFTP to push out changes to their sites should really need to be practicing more long term sustainable procedures. Setting up a git server is really simple. See https://dev.rubysecurity.org/awesome-applications/git/setting-up-a-git-server-in-centos-6-5.
Git workflow
I prefer to only communicate with Git over ssh and not https. Since I don’t use the default ssh port, the initial repository clone looks like this:
git clone ssh://$GIT-USER@$GIT-SERVER:$SSH-PORT/home/git/$REPO
GitHub has become the defacto Git hosting provider. I think much of it’s success, aside from the fact that Git is an amazing piece of software, is GitHub’s polished web user interface. While Git ships with a daemon that provides a visual look at the repositories, it’s definitely not pretty. I wanted to have a local GitHub like interface on my private git repos, so I decided to use GitList. GitList is fairly minimalistic. Requiring just PHP and mod_rewrite, it allows you to browse your repositories, view files under different revisions, commit history and diffs. Configuring GitList is really easy.
git clone https://github.com/klaussilveira/gitlist.git
cd gitlist
chmod 777 cache
mv config.ini-example config.ini
Then update config.ini to point to the location where the Git repositories are stored in the server. On my server, they’re located in /home/git.
repositories[] = '/home/git/';
Lastly, is just configuring the web server’s virtual host. Since I use Apache mine looks like this.
<VirtualHost 192.168.1.16:443>
        ServerName git.rubyninja.org
        ServerAlias git.rubyninja.org

        DocumentRoot /var/www/gitlist

        <Directory "/var/www/gitlist">
                AllowOverride All
                AuthType Basic
                AuthName "Git Repos"
                AuthUserFile /home/svn/.htpasswd
                Require valid-user
        </Directory>;

        SSLEngine on
        SSLCertificateFile /etc/httpd/certs/svn.rubyninja.org.crt
        SSLCertificateKeyFile /etc/httpd/certs/svn.rubyninja.org.key
        SSLCACertificateFile /etc/httpd/certs/rubyninjaCA.crt

        ErrorLog logs/git_ssl_error_log
        CustomLog logs/git_ssl_request_log \
                "%t %h %{SSL_PROTOCOL}x %{SSL_CIPHER}x \"%r\" %b"
</VirtualHost>
GitList
php git apache July 7, 2015
Git Ansible Playbooks
by Alpha01
One of the reasons I love Ansible over any other config management tool is because of its simplistic design and ease of use. It literally took me less than 15 minutes to write a set of playbooks to manage my local git server.
git_server_setup.yml - configures base server git repository configuration.
---
- hosts: git
  tasks:
  - name: Installing git package
    yum: name=git state=latest

  - name: Creating developers group
    group: name=developers state=present

  - name: Creating git user
    user: name=git group=developers home=/home/git shell=/sbin/nologin

  - name: Updating /home/git permissions
    file: path=/home/git mode=2770
create_git_user.yml - creates local system git user accounts.
---
- hosts: git
  tasks:

  - name: Creating new git user
    user: name={{ user_name }} password={{ user_password }} home=/home/git shell=/usr/bin/git-shell group=developers

  vars_prompt:
  - name: "user_name"
    prompt: "Enter a new git username"
    private: no

  - name: "user_password"
    prompt: "Enter a password for the new git user"
    private: yes
    encrypt: "sha512_crypt"
    confirm: yes
    salt_size: 7
create_git_repo.yml - creates an empty bare git repository.
---
- hosts: git
  vars:
    repo_name: www.alpha01.org

  tasks:
  - file: path=/home/git/{{ repo_name }} state=directory mode=2770

  - name: Creating {{ repo_name }} git repository
    command: git init --bare --shared /home/git/{{ repo_name }}

  - name: Updating repo permissions
    file: path=/home/git/{{ repo_name }} recurse=yes owner=git
ansible git June 22, 2015
Server Move and Upgrades!
by Alpha01
My little corner of the internet has a new home. My old $29.99 8GB RAM, 3.40GHz Intel Core i3 dedicated server was simply not enough to handle my server needs. Which apparently OVH doesn’t even provide that service anymore. So instead I hoped to their mid-tear dedicated service service branch they call So you Start. I opted with their $49.00 SYS-IP-2 service. Now my server’s specs is a follows:
- 2.66 GHz+ Intel Xeon W3520 (4 cores/ 8 threads)
- 32 GB ECC
- 2 x 2 TB SATA drives (Software RAID)
I would’ve love the drives to be SAS and the RAID to be hardware based, but it’s definitely not a deal breaker, and just $49.99 a month, it’s not much to complain about.
CentOS 6 to CentOS 7 upgrade
My server migration was fairly straight forward for the most part. I opted to re-create the KVM hypervisor and its guests from scratch. Mainly because I wanted to upgrade all of guests and host from CentOS 6 to CentOS 7. This is where I encountered my first problem. Since I rely on custom nat PREROUTING and POSTROUTING iptables firewall rules for my VMs to properly be able to talk to each other and to the internet. I realized CentOS 7 defaults to firewalld, so instead of trying to rewrite my firewall rules to be compatible with firewalld, I decided to continue to use CentOS 6 on my host operating system, and only upgrade my guests VMs to CentOS 7.
On a side note, my previous guest VMs were originally using raw image format (default cache settings) for its storage, and by god what a hell of a difference it makes changing to use native block storage via LVM. I/O performance on my old server was terrible, the I/O wait percentage was roughly about 6%, now it’s less than 1%. Even with the software raid, I/O performance is much better on my new server.
PHP 5.3 to 5.6 upgrade
Since I don’t have anything heavily customized on any of sites, the PHP version upgrade was practically painless.
Apache 2.2 to 2.4 upgrade
Luckily, upgrading Apache wasn’t a big hassle. Anyone considering upgrading from 2.2 to 2.4, it’s definitely worth checking out the official upgrade documentation since dropping the old 2.2 configs in onto a 2.4 environment won’t work off the gecko. In my case all of my sites were returning 403 forbidden replies and non of my .htaccess files weren’t being read by Apache. The fix was really simple.
<Directory /www/path-to-webroot>
    AllowOverride All
    Require all granted
</Directory>
I must say, I really like Apache 2.4 new authorization syntax. What used to be a three line configuration is now a single line configuration, and much more human readable.
Future Upgrade Plans
I didn’t tackle this during the server migration, but I’ll definitely going to be upgrading to Varnish 4 and use PHP FastCGI via php-fpm and mod_proxy_fcgi.
kvm php centos iptables apache June 14, 2015
Networking Quirk in CentOS 7 - Virtual IP not being assigned
by Alpha01
I just realized the order of which the IP configurations are set in the /etc/sysconfig/networking-scripts/ifcfg-* file does matter. For example the following config was failing to assign the virtual IP 192.168.100.218 on one of my systems:
TYPE="Ethernet"
BOOTPROTO="static"
IPADDR=192.168.100.218
NETMASK=255.255.255.0
DEVICE="ens3:1"
NAME="ens3:1"
ONBOOT="yes
Systemd was spitting out the following errors:
Jun 14 01:04:19 webapps network: RTNETLINK answers: File exists
Jun 14 01:04:19 webapps network: RTNETLINK answers: File exists
Jun 14 01:04:19 webapps network: RTNETLINK answers: File exists
Jun 14 01:04:19 webapps network: RTNETLINK answers: File exists
Fix
It turns out that the DEVICE and NAME declaration needs to be assigned and specified before the networking information.
DEVICE="ens3:1"
TYPE="Ethernet"
NAME="ens3:1"
BOOTPROTO="static"
IPADDR=192.168.100.218
NETMASK=255.255.255.0
ONBOOT="yes"
centos networking June 4, 2015
Automated SSL certificate expiration check
by Alpha01
It is quite simple to automate checking for near expiring SSL certificates in CentOS. This is accomplished using the certwatch tool. This tool is part of the crypto-utils package.
yum install crypto-utils
``

Installing `crypto-utils`, will create the following cron job, `/etc/cron.daily/certwatch`. By default the `/etc/cron.daily/certwatch` script only checks for SSL certificates loaded by Apache (`httpd -t -DDUMP_CERTS`). So Apache users don't have to do any additional config changes to in order to  automate the check of near expiring SSL certificates.

Since in https://www.rubysecurity.org I use Nginx as a SSL termination proxy for an Apache backend webapp on a different machine. I had to manually update the `/etc/cron.daily/certwatch` script to point to my SSL certificates directly.

```bash
#certs=`${httpd} ${OPTIONS} -t -DDUMP_CERTS 2>/dev/null | /bin/sort -u`
INCLUDE_CERTS='/etc/nginx/certs/*.crt'
certs=`ls $INCLUDE_CERTS 2>/dev/null`
Here is an example of an expired SSL certificate alert
[root@rubyninja certs]# certwatch /etc/nginx/certs/www.rubysecurity.org_2014/www.rubysecurity.org.crt
To: root
Subject: The certificate for www.rubysecurity.org has expired

 ################# SSL Certificate Warning ################

  Certificate for hostname 'www.rubysecurity.org', in file (or by nickname):
     /etc/nginx/certs/www.rubysecurity.org_2014/www.rubysecurity.org.crt

  The certificate needs to be renewed; this can be done
  using the 'genkey' program.

  Browsers will not be able to correctly connect to this
  web site using SSL until the certificate is renewed.

 ##########################################################
                                  Generated by certwatch(1)
certwatch is far from perfect. It doesn’t have any verbose output when doing a check, it solely relies on its exit status to verify if the check was successful. Excerpt from the man page is somewthat appalling.
DIAGNOSTICS
       The exit code indicates the state of the certificate:

       0
           The certificate is outside its validity period, or approaching expiry

       1
           The certificate is inside its validity period, or could not be parsed
centos monitoring